This guide will show you how to install the switchboard for Cybdyn Systems PSIO flash cartridge in to a Sony PlayStation.
The guides here have a number of improvements over the official PSIO install guides by reducing the required steps for some of the console revisions such as less trace cuts, less solder mask removal, and alternative and improved solder points. PSIO are easy to install once simple tricks are learnt and followed.
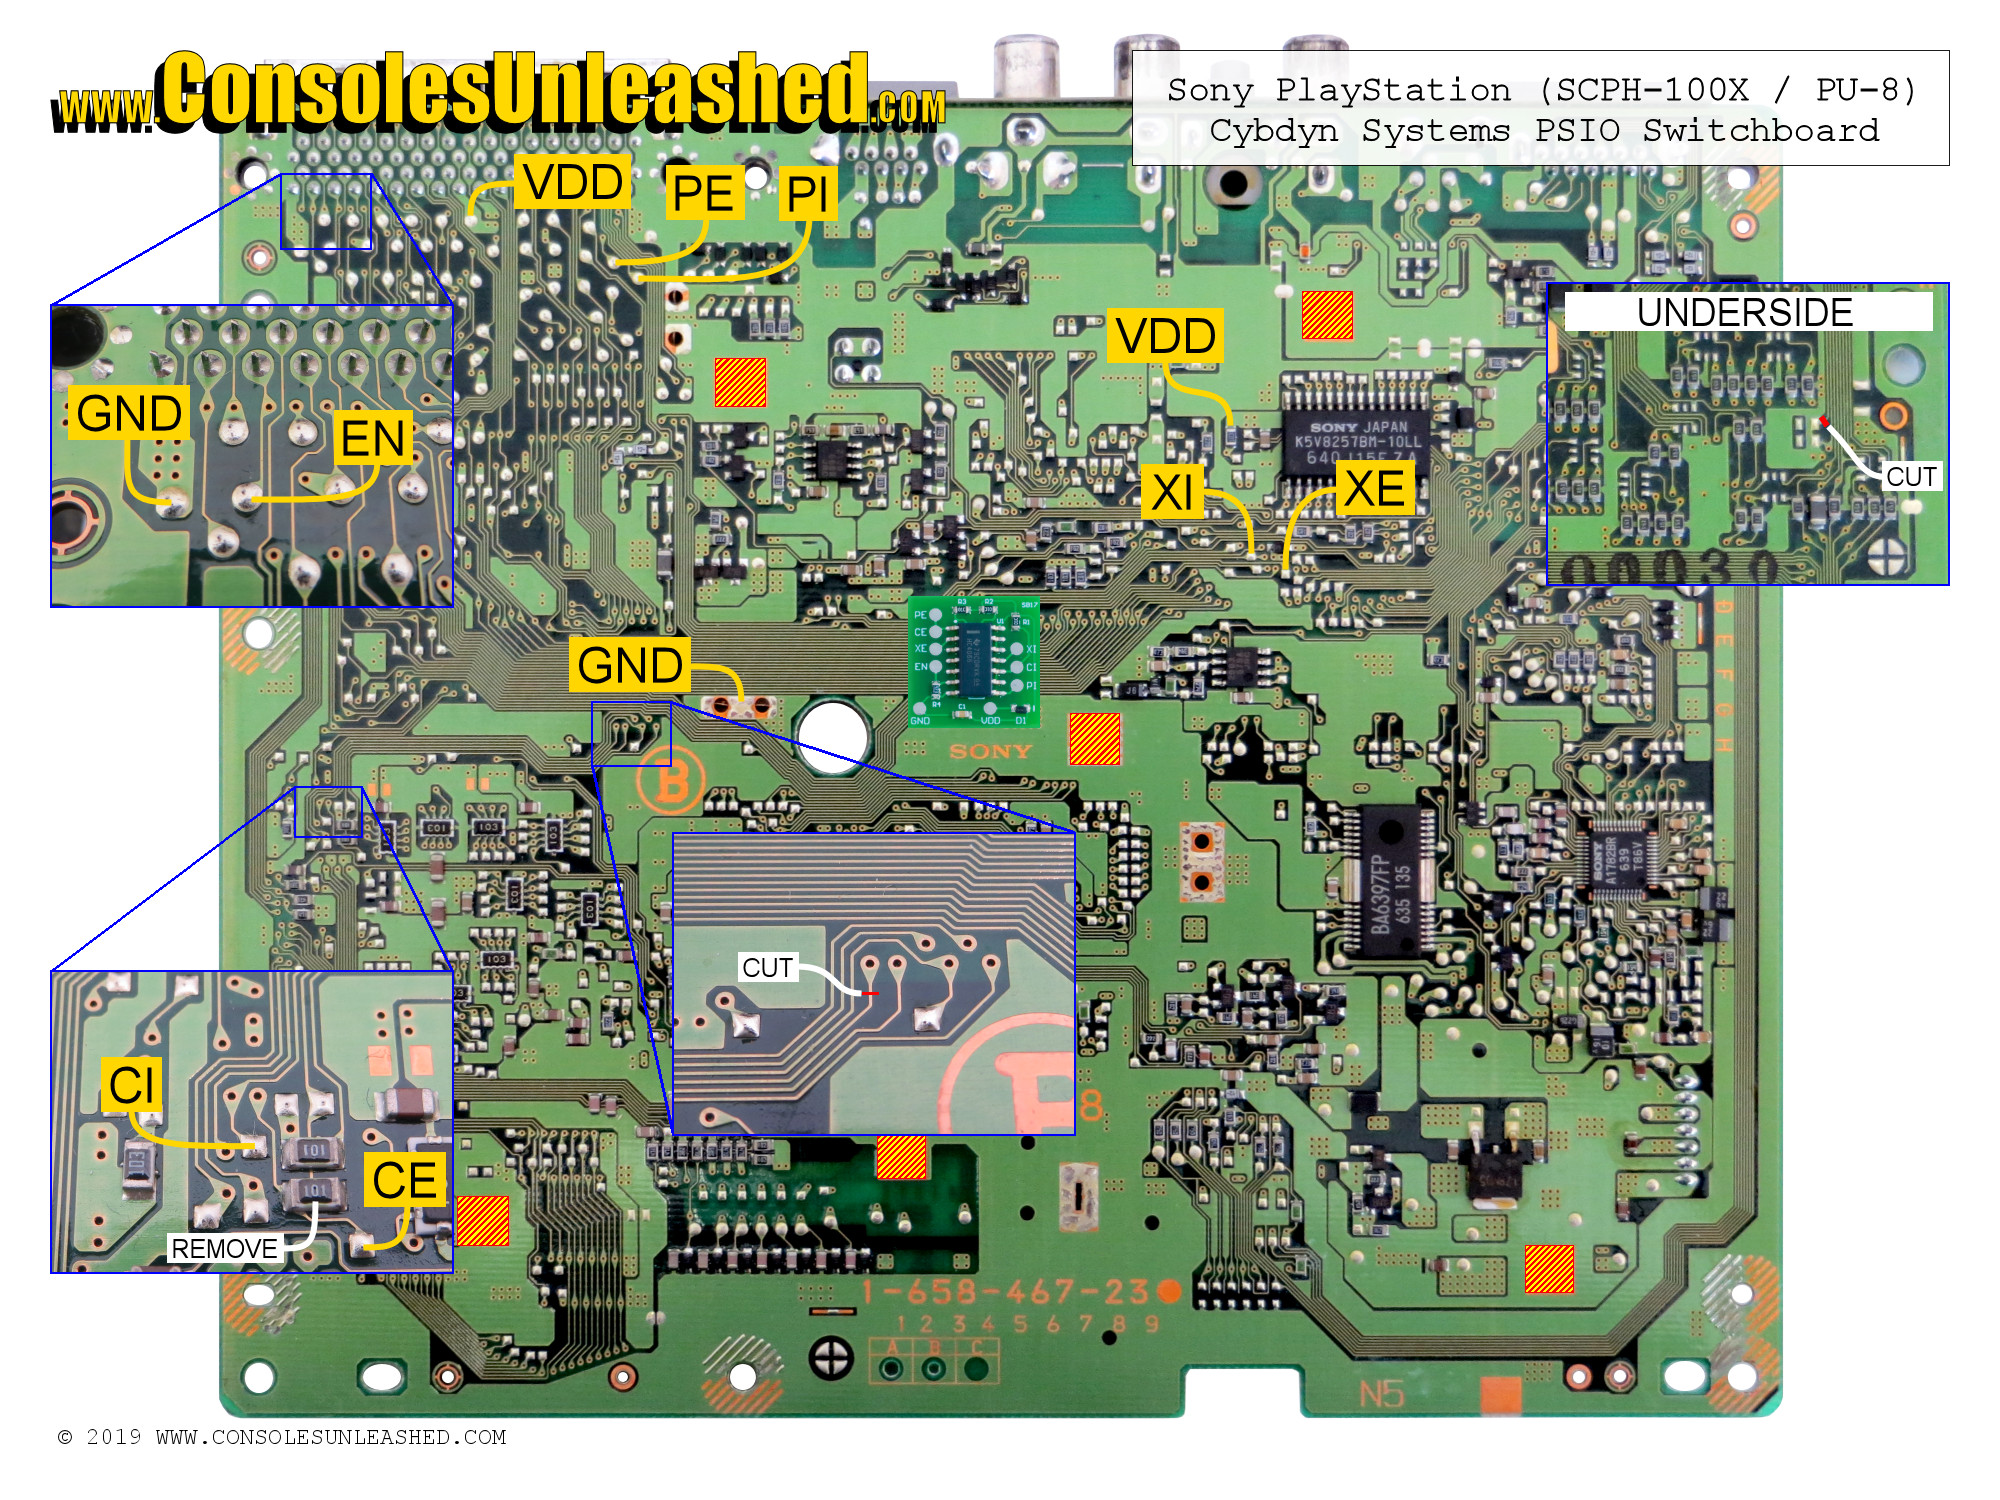
SCPH-100X / PU-8 Solder Map
2 trace cuts, 1 resistor removal, 0 via mask removal, 0 via solder points, 0 port pin solder points.
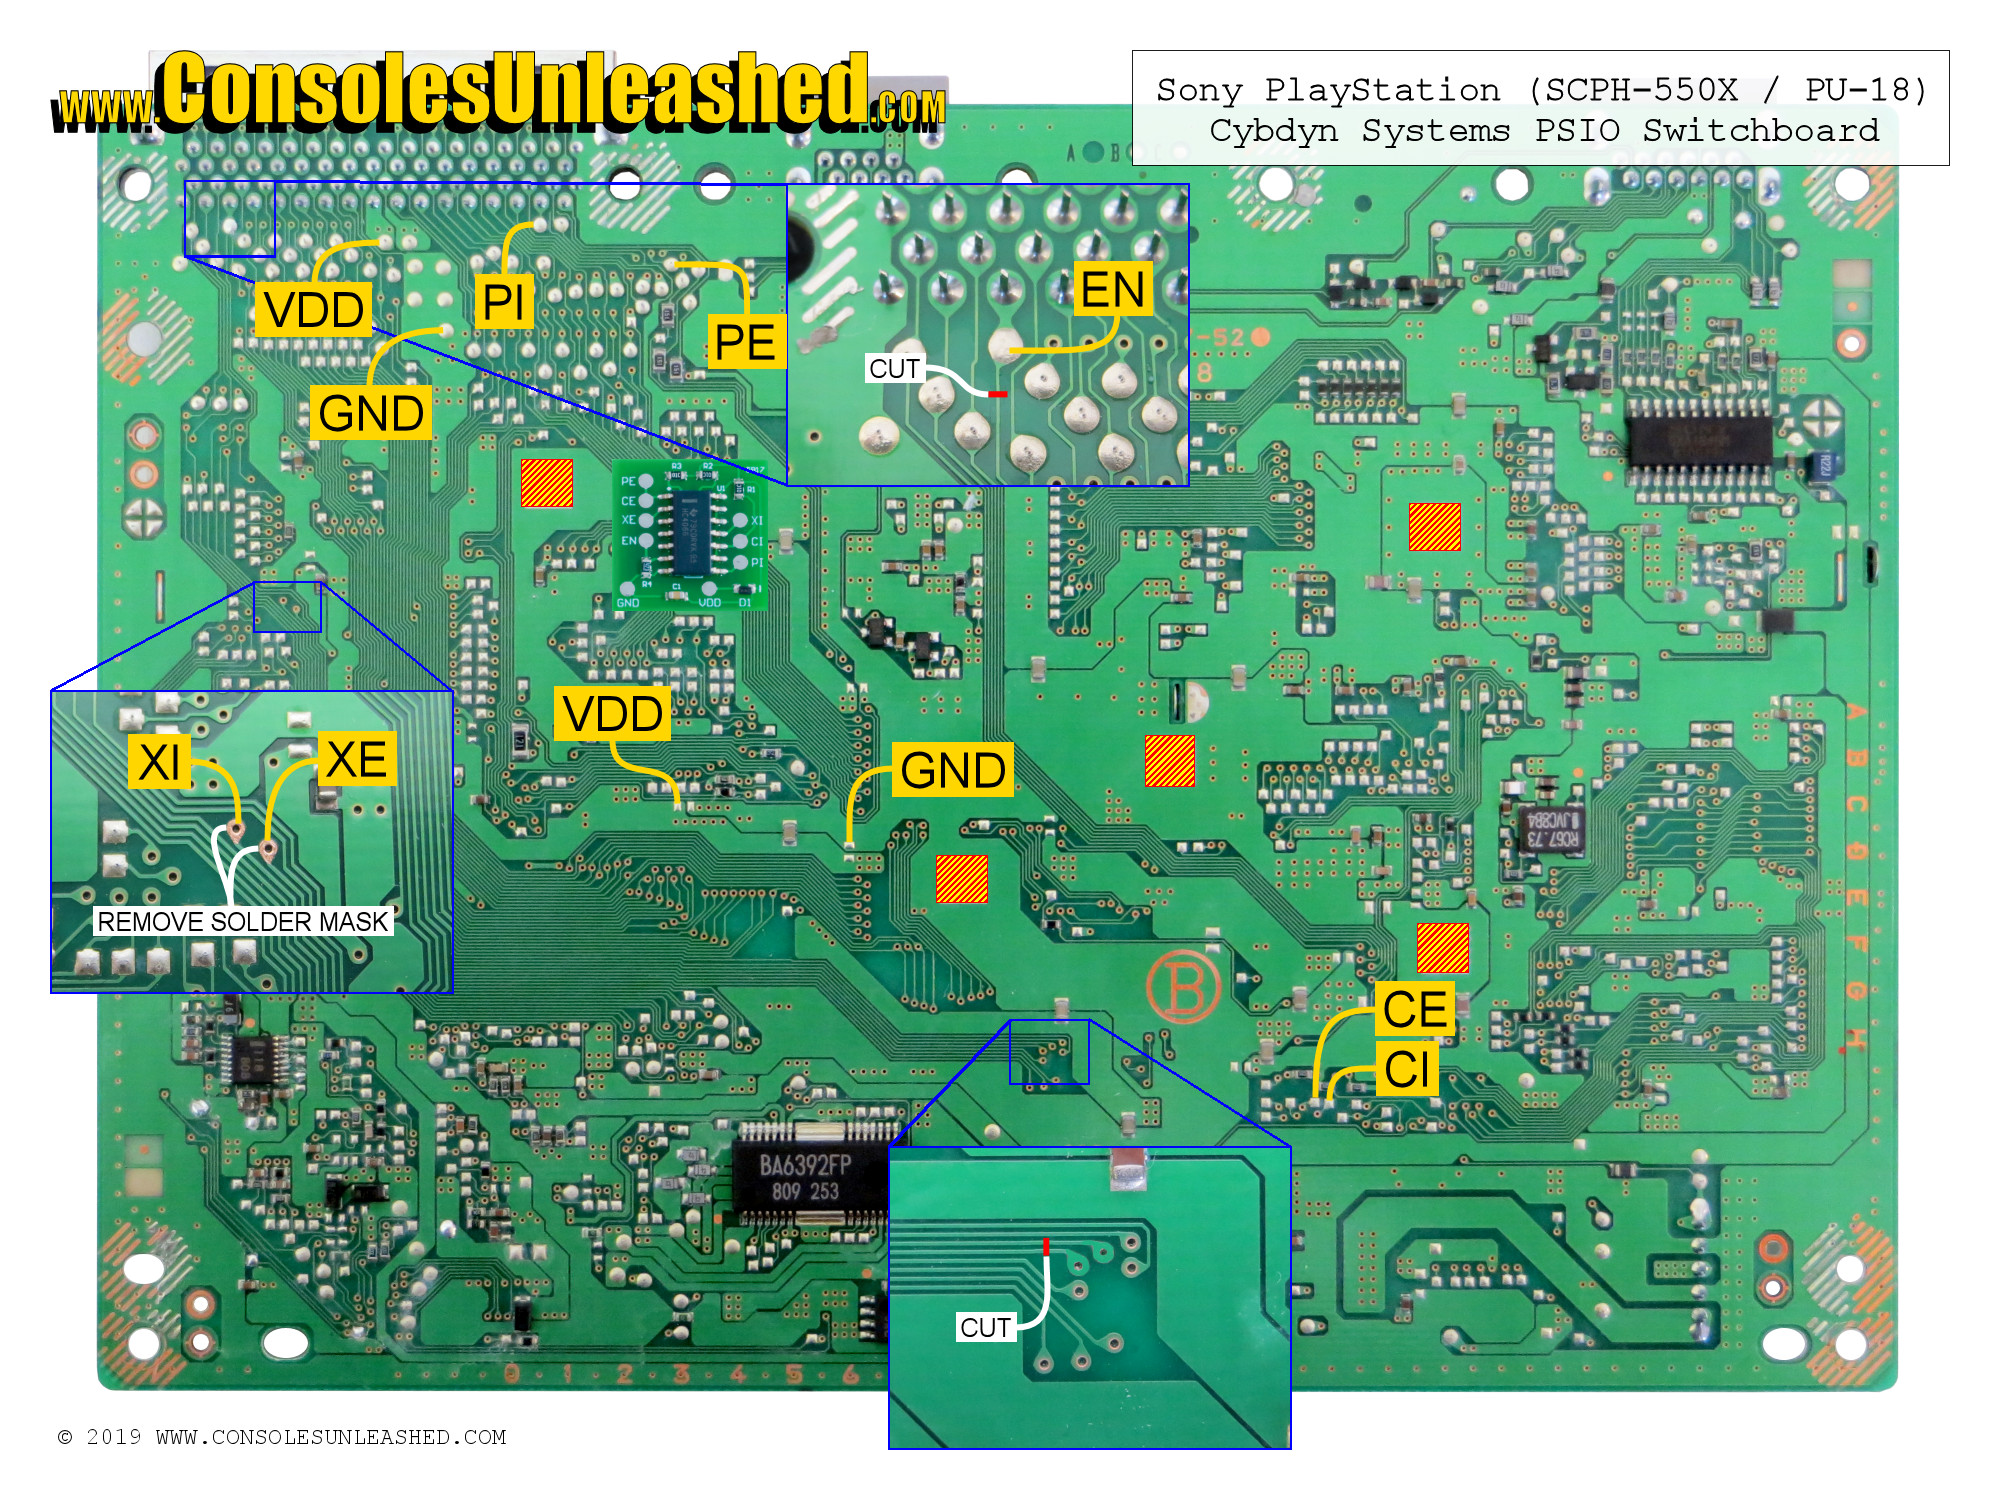
SCPH-550X / PU-18 Solder Map
3 trace cuts, 2 via solder mask removal, 2 via solder points, 0 port pin solder points.
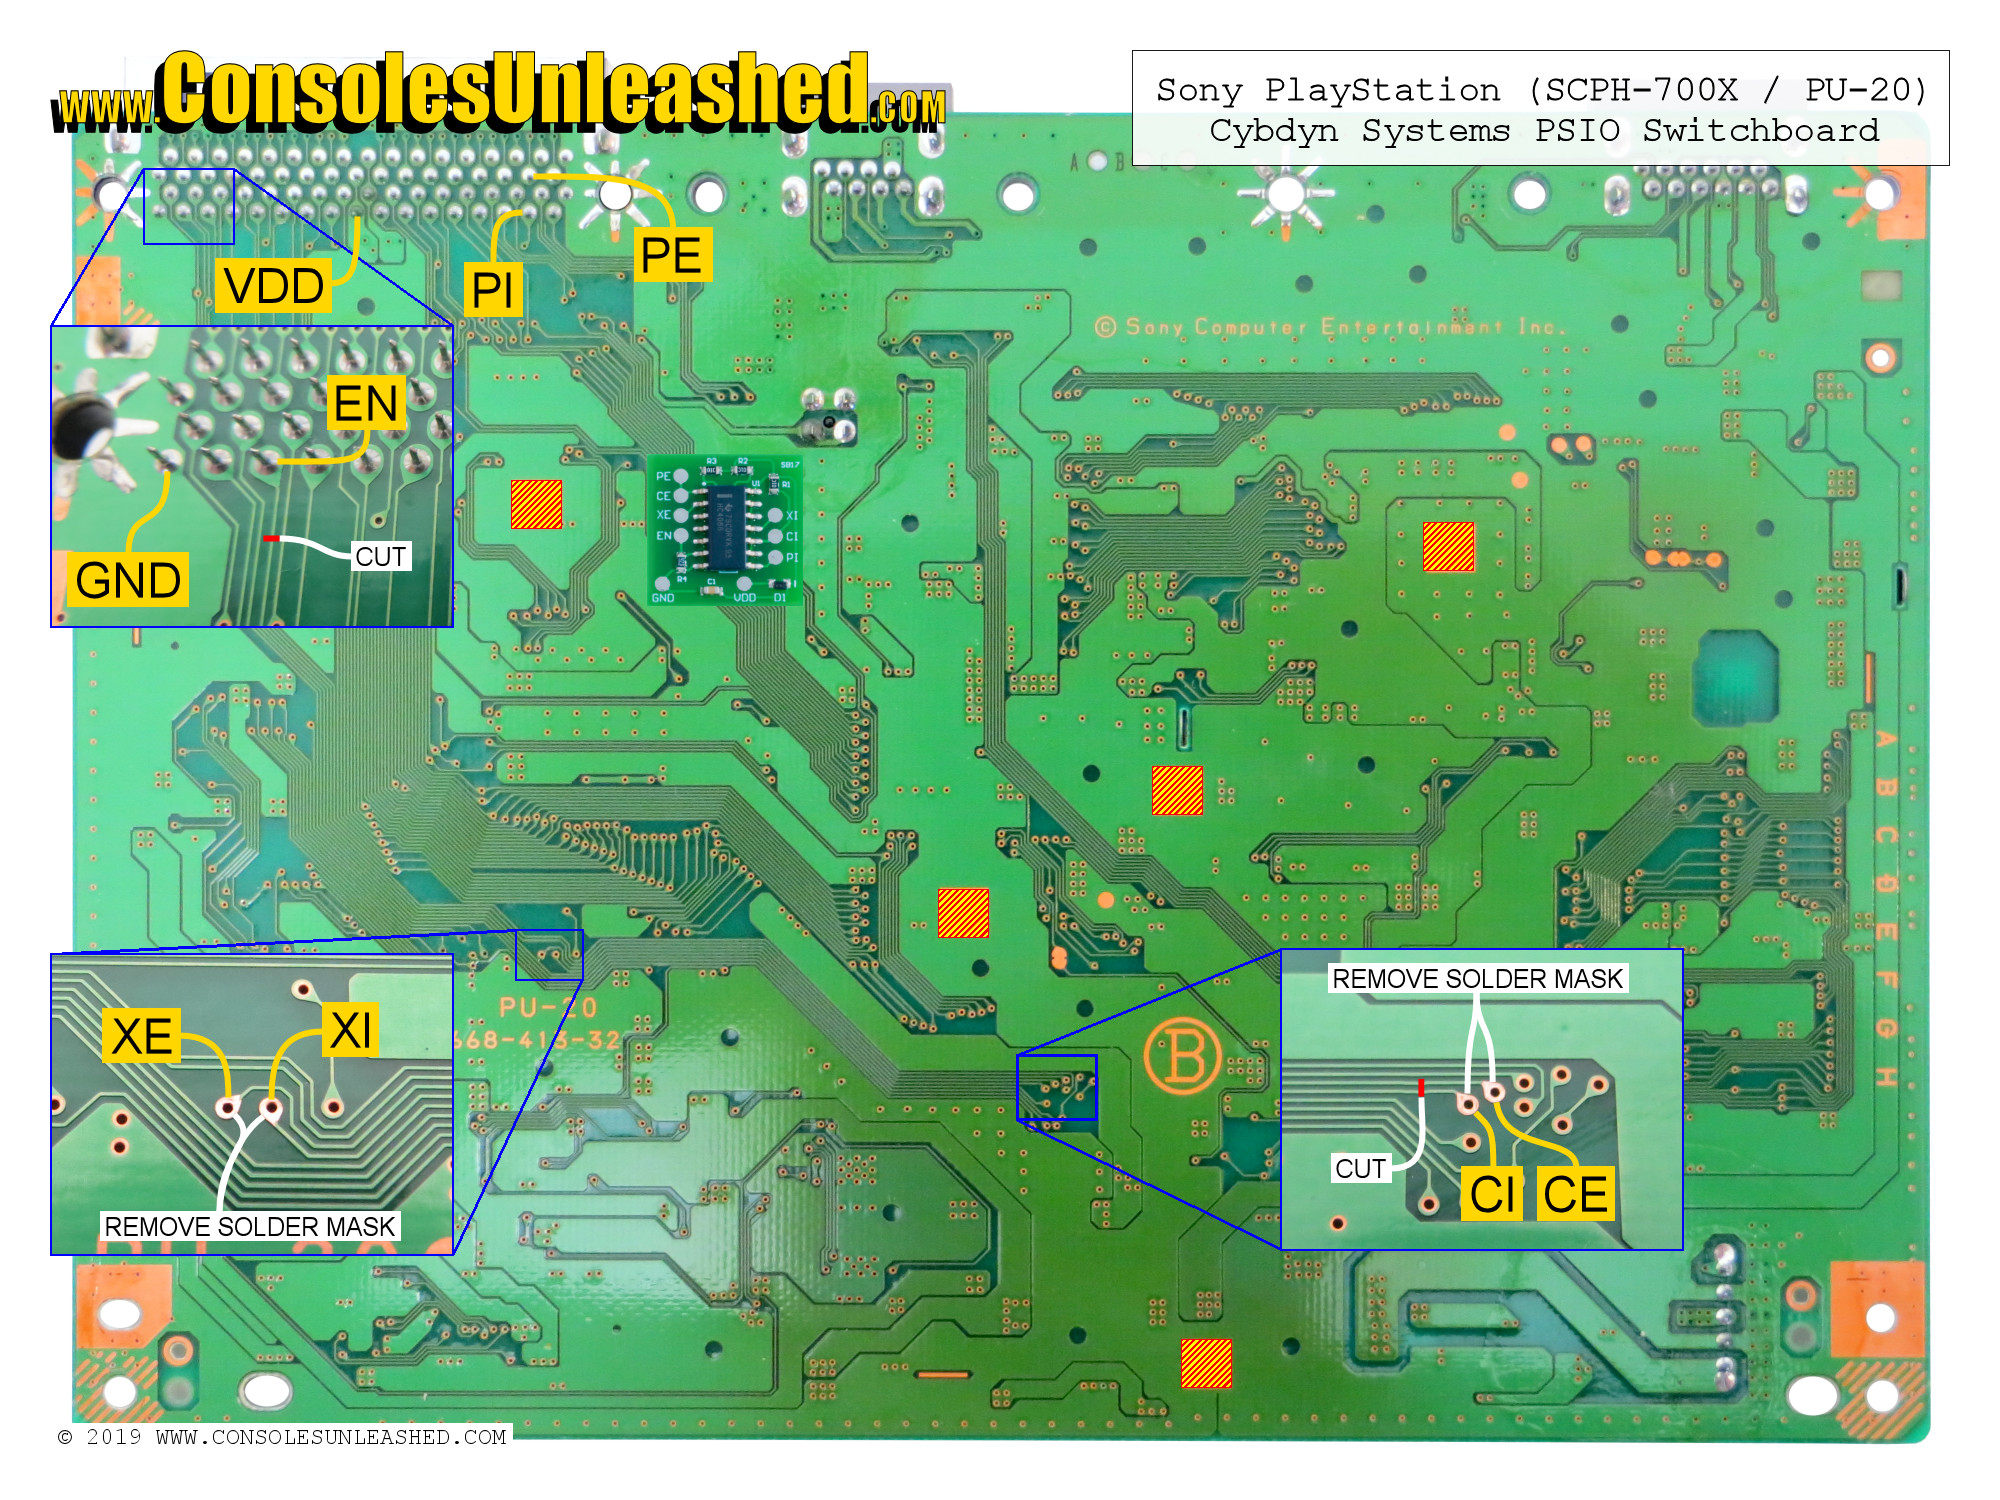
SCPH-700X / PU-20 Solder Map
Three trace cuts, 4 via solder mask removal, 4 via soldering points, 5 port pin soldering points.
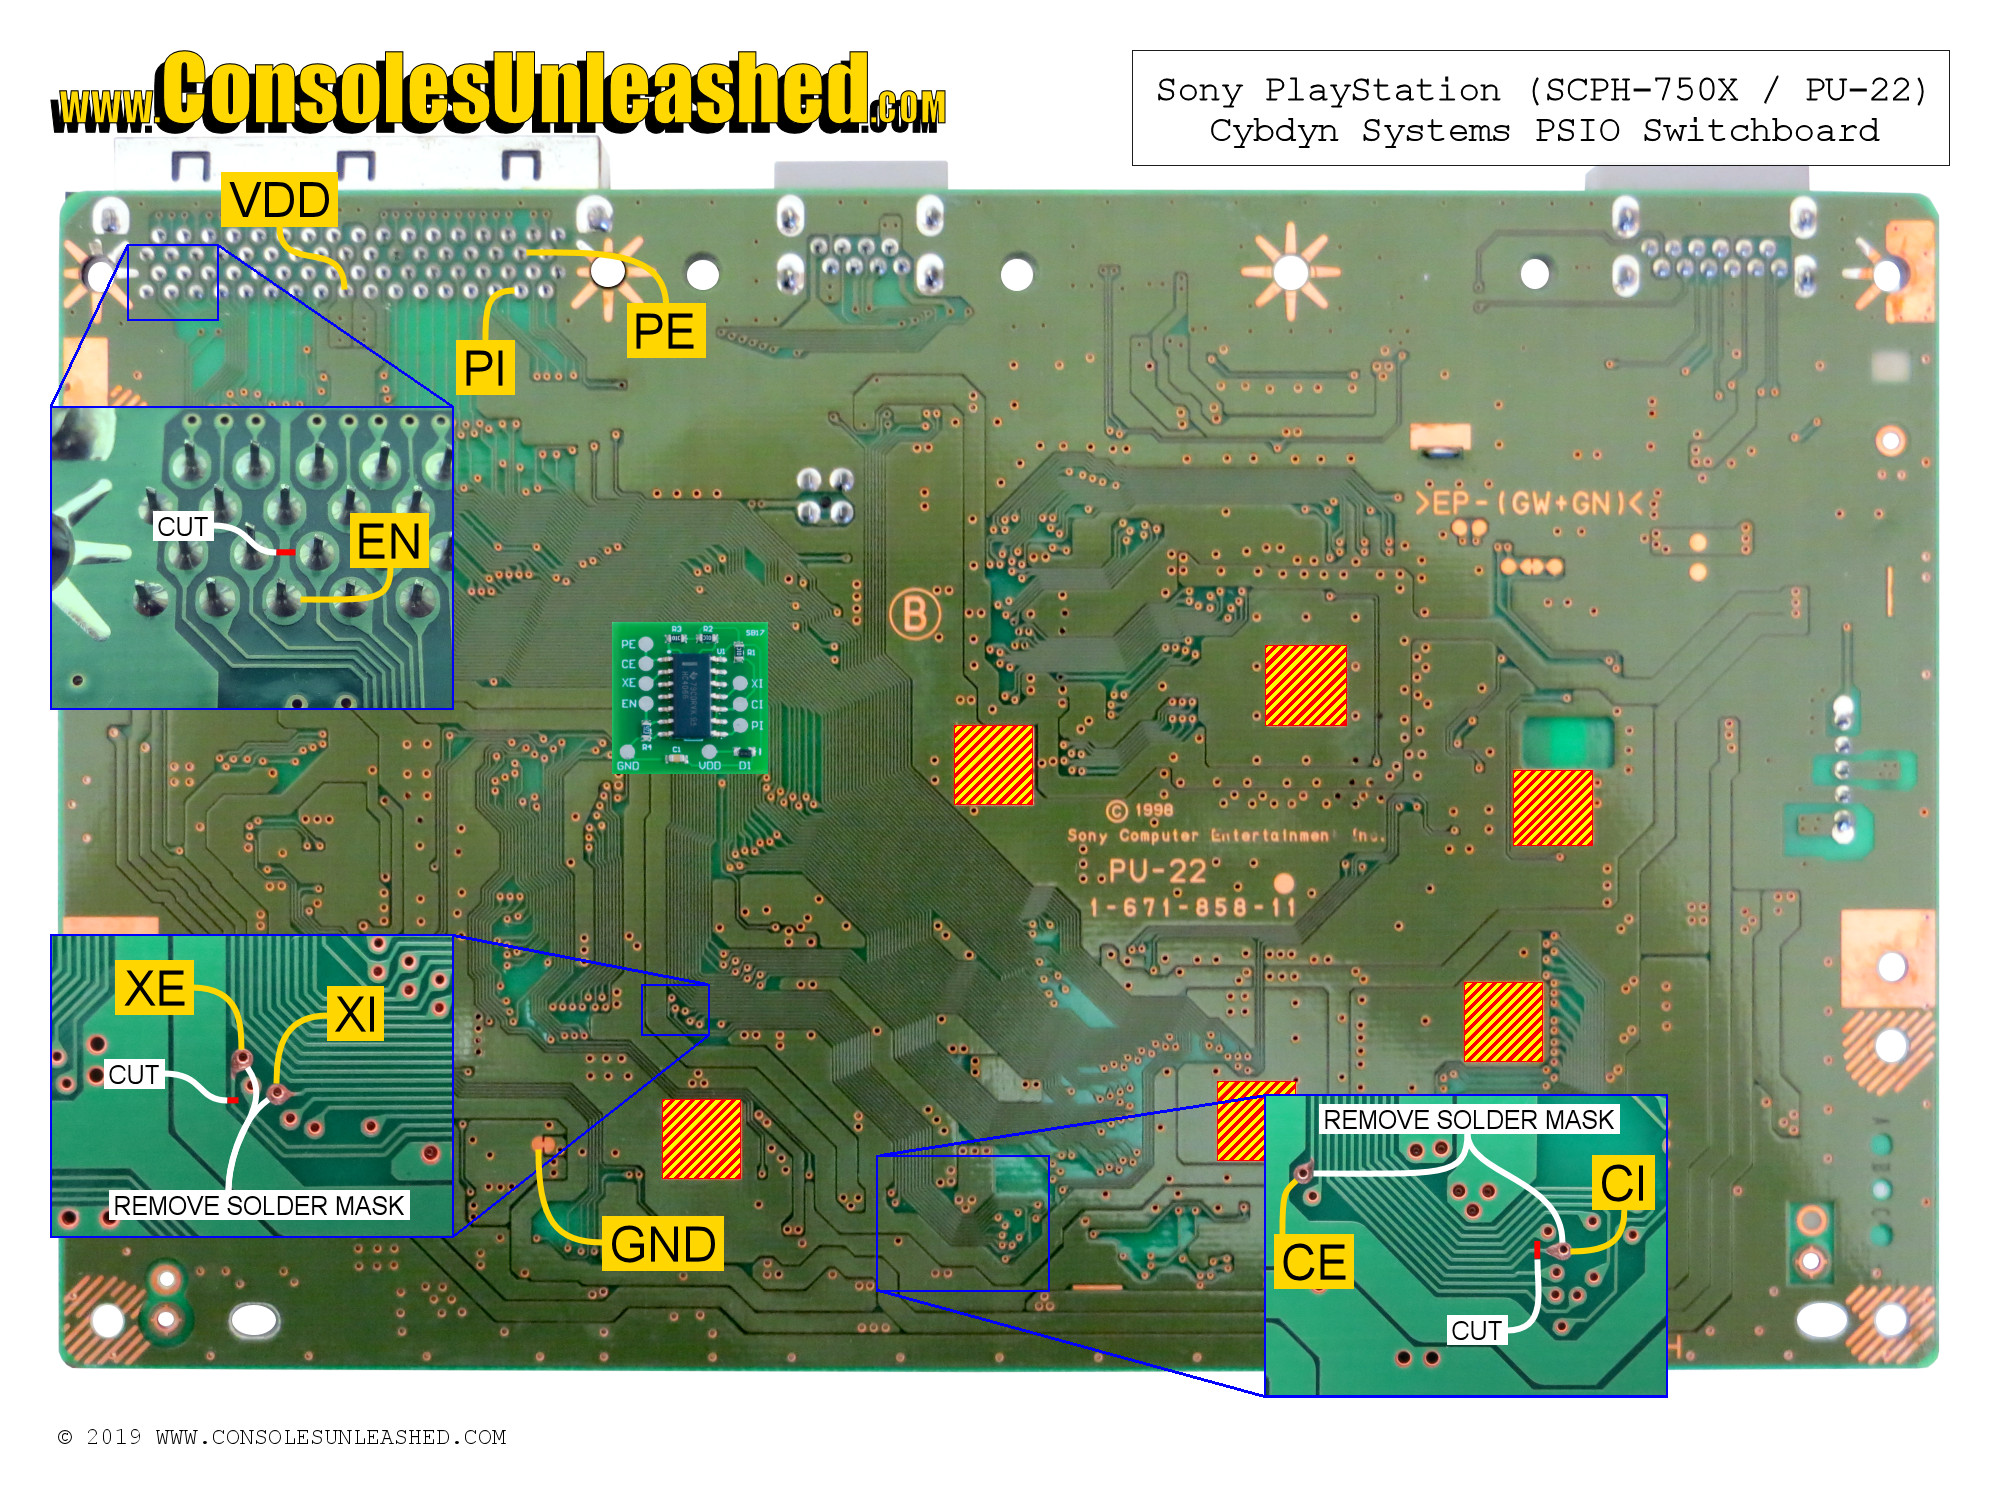
SCPH-750X / PU-22 Solder Map
3 trace cuts, 4 via solder mask removal, 4 via soldering points, 4 port pin soldering points.
Achieving Perfect Trace Cut
Coming soon.
Achieving Perfect Via Solder Mask Removal
Coming soon.
Achieving Minimal Wire Lengths and Neat Wire Runs
Coming soon.